
Category: New World

New World: Best Places to Find Platinum

In New World, the massively popular MMORPG by Amazon Games, gathering and crafting play a significant role in the gameplay experience. One of the most sought-after resources in the game is Platinum, an essential material used for crafting high-tier items like gear, jewelry, and tools. If you’re looking to maximize your gathering efficiency, knowing the best locations to farm Platinum can save you hours of grinding, and can bring you more New World Gold.

In this article, we’ll explore the top spots for Platinum farming, the mechanics behind gathering this rare resource, and some helpful tips to optimize your Platinum gathering in New World.

What is Platinum in New World?

Platinum is a rare and valuable metal in New World that is used primarily for crafting higher-end items. Its main uses include crafting items such as:

Platinum Ingots (used for crafting Platinum-based weapons and armor)

Platinum Jewelry (rings, amulets, etc.)

Upgrading Tools (for better efficiency in gathering)

As Platinum is used for creating powerful end-game gear and crafting upgrades, its demand tends to be high on the market. It’s also needed for progression in crafting and upgrading certain items. Players who focus on crafting and end-game progression will find themselves looking for Platinum often.

How to Mine Platinum in New World

In New World, Platinum is found in the form of Platinum Ore. To gather Platinum Ore, players must equip a pickaxe and mine Platinum nodes. These nodes appear in certain areas of the map, usually in regions with high-level gathering resources. Platinum Ore can then be refined into Platinum Ingots at a Smelter, using a combination of other materials.

To efficiently mine Platinum, you’ll need to:

Equip the right tools – A higher-tier pickaxe will give you better chances of gathering Platinum Ore from nodes.

Focus on areas with Platinum nodes – Knowing where these nodes are located is crucial, as some regions have better spawn rates and higher node concentrations.

Pay attention to territory levels – Platinum Ore usually spawns in mid to high-level zones, so you’ll need to venture into more dangerous areas or areas where high-level enemies reside.

Best Places to Find Platinum in New World

While Platinum can technically be found across various zones, certain areas are known to have richer veins and higher concentrations of Platinum nodes. Here are some of the best locations to farm Platinum in New World:

1. Shattered Mountain

Shattered Mountain is one of the prime locations for Platinum farming in New World. This region is considered one of the highest-level zones, populated by level 60+ enemies. The mountainous terrain, filled with cliffs and caves, holds a variety of valuable resources, including Platinum.

Why it’s great: High Platinum node density. The zone is rich in ore veins, and you can often find Platinum alongside other valuable materials like Gold, Iron, and Starmetal.

Challenges: Shattered Mountain is home to some of the game’s most difficult enemies, so you’ll need to be prepared for combat or make sure you’re farming during lower-traffic hours.

2. Ebonscale Reach

Ebonscale Reach, located in the southern part of Aeternum, is another great area for Platinum farming. This region is filled with rivers, forests, and cliff sides that make it a beautiful but treacherous place to gather resources.

Why it’s great: It has a relatively higher spawn rate for Platinum veins compared to other zones, and it’s also home to some other valuable ores like Starmetal and Orichalcum, which makes it a lucrative spot for ore farming overall.

Challenges: Ebonscale Reach is a high-level area with strong enemies, and players may also encounter PvP combat if they are in a faction-controlled territory.

3. The Great Cleave

The Great Cleave is a large zone that stretches across the central part of Aeternum, filled with vast plains, dense forests, and plenty of ore deposits. While this area is known for its rich resource nodes, the Platinum nodes can be found in specific spots.

Why it’s great: It’s an expansive zone, and although the concentration of Platinum nodes is not as high as Shattered Mountain or Ebonscale Reach, the large open areas and relatively lower risk of high-level mobs make this a solid location to farm.

Challenges: While there aren’t as many high-level enemies in this area, the sheer size of the zone means you may need to cover a lot of ground to get to the best Platinum node locations.

4. Reekwater

Reekwater is another high-level zone with ample mining opportunities. It is home to some of the most rewarding and challenging content in the game, so be prepared for hostile mobs and even other players looking to farm resources.

Why it’s great: Reekwater’s varied terrain includes caves, cliffs, and mining-rich hills that yield Platinum. The region also boasts a number of elite resources, making it a great place to gather not just Platinum but other rare ores as well.

Challenges: The risk of PvP is significant here due to the nature of the game’s faction dynamics and the presence of powerful elite enemies.

5. Mourningdale

Mourningdale, located in the northern part of the map, is a more intermediate-level zone compared to some of the others on this list. The region is filled with a variety of resources, and although Platinum is somewhat scarce, you can still find decent quantities of it.

Why it’s great: Mourningdale’s Platinum veins are often mixed with other valuable ore deposits like Gold and Starmetal, and it’s a relatively safer location compared to other high-level zones.

Challenges: While not as dangerous as other areas, Mourningdale still has its share of enemies, and the node density is lower, so farming may require more time and patience.

Tips for Efficient Platinum Farming

Use a Tier 5 Pickaxe: Ensure you have the best pickaxe available, as this increases your chances of mining Platinum and other valuable ores.

Consider Gathering Bonuses: Equip gear or consumables that boost your gathering yield, such as Gathering Luck or appropriate crafting perks.

Team Up for Safety: If you’re farming in high-level zones, consider teaming up with other players to reduce the risk of being attacked by hostile mobs or other players (if you’re in PvP mode).

Check for Active Wars and Faction Control: If you’re farming in a zone that’s contested by factions, be aware of potential PvP encounters. Choosing a time when the area is less populated can help you avoid these situations.

Rotate Between Nodes: Some Platinum nodes may have long respawn timers, so if you can, rotate between farming spots in different areas to make the most of your gathering time.

Conclusion

Platinum is one of the more sought-after resources in New World, and knowing where to find it can make a huge difference in your ability to craft powerful gear and progress through the game. The best Platinum farming locations are generally in the higher-level zones, such as Shattered Mountain, Ebonscale Reach, and The Great Cleave, where the Platinum node density is the highest. If you want more resources, you can also choose to buy cheap New World Gold coins.

Whether you’re a crafter looking to level up your skills or a player interested in profiting from the Platinum market, knowing the best areas and farming tips will make your journey through New World much more efficient. Happy mining!
The Demon’s Cauldron – New World Guide

The Demon’s Cauldron is one of the most challenging and rewarding expedition dungeons in New World, Amazon Game Studios’ MMORPG. It’s located in the vast, mystical world of Aeternum and is known for its terrifying atmosphere, intense difficulty, and the potential for high rewards. For players who are eager to test their skills, conquer daunting foes, and reap New World Gold, The Demon’s Cauldron presents an exciting yet perilous challenge.

This guide is aimed at helping adventurers navigate this high-stakes dungeon, providing in-depth strategies, tips on how to deal with its various mechanics, and essential information to make the most out of your time in the Cauldron.

Overview of The Demon’s Cauldron

The Demon’s Cauldron is a level 60+ Expedition, requiring a group of 5 players to tackle it. It’s located in the Edengrove, a sprawling, dangerous region that adds a mystical feel to the dungeon’s environment. As with most endgame expeditions in New World, the dungeon features a combination of powerful enemies, puzzles, and challenging boss mechanics.

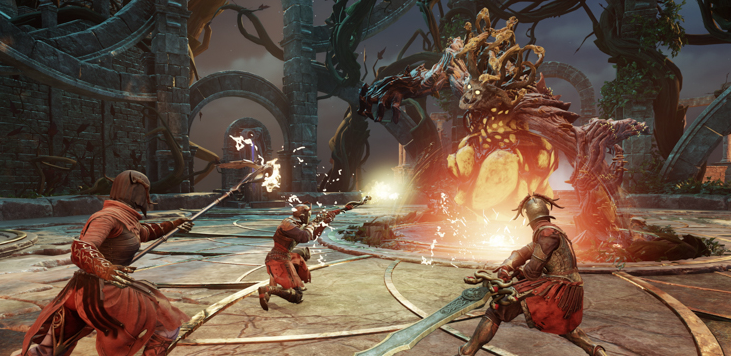
What sets the Demon’s Cauldron apart is its theme, revolving around a fiery, infernal landscape that is not only visually striking but also deadly to the unprepared. Players will face a series of escalating challenges as they push deeper into the dungeon’s layers, culminating in a confrontation with the final boss, a Demon lord of extraordinary power.

The dungeon’s atmosphere is bleak, with pools of lava, dark skies, and the relentless sounds of infernal creatures lurking. The journey through the Cauldron will test the endurance of any group, requiring coordination, strategy, and precise execution.

Preparing for the Expedition

Before diving into the Demon’s Cauldron, proper preparation is crucial. Here’s a checklist to ensure you and your group are ready for the challenges that lie ahead.

1. Recommended Gear and Level Requirements

The Demon’s Cauldron is designed for level 60+ players. It is highly recommended that your group be at least level 60 to comfortably handle the enemies. Ideally, each member should have gear that is at least 580-600 GS (Gear Score), but higher gear levels will significantly improve your odds of success.

The dungeon is also known for its difficult mechanics, so players should focus on having high durability and damage output. A balance between DPS (damage dealers), tanks, and healers is key.

Tanks: It’s essential for the tank to have a high constitution and the ability to survive sustained damage from fiery enemies. You’ll also want a strong set of defense-oriented perks.

DPS: Damage dealers should focus on weapons that can deal sustained damage. Good choices include Greatsword, Musket, and War Hammer.

Healers: Healers are crucial in keeping the group alive during the tougher encounters, so they should focus on buffs that improve healing output, as well as perks that boost sustainability.

2. Consumables and Supplies

Stock up on the following items before entering the dungeon:

Healing potions: Essential for all members to stay alive, particularly in moments where healing isn’t immediately available.

Mana potions: For mages and healers who use mana-intensive abilities.

Fireproof Tinctures: Considering the infernal theme, many enemies in the dungeon will deal fire damage, and having these potions can provide a significant advantage.

Repair Kits: Gear will inevitably take damage, especially in long dungeon runs. Always have repair kits on hand.

Fire Resistance Gear: Some armor and accessories come with fire resistance bonuses, which will help mitigate the damage from fire-based attacks.

3. Group Composition and Strategy

As with any New World Expedition, synergy among the group members is key to success. Your group should consist of at least the following roles:

Tank: The tank will need to focus on managing aggro from the many bosses and elite enemies, as well as mitigating incoming fire damage.

DPS (Damage Dealers): Two or three DPS members are ideal. Their primary role is to deal consistent damage while avoiding the numerous environmental hazards.

Healer: A skilled healer can mean the difference between victory and failure. They must manage health pools and ensure the group stays topped off, especially during high-damage phases.

Communication is critical throughout the dungeon. With a variety of mechanics requiring coordinated timing, voice chat or some form of communication is necessary to handle the Cauldron’s challenges.

Navigating the Demon’s Cauldron

The Demon’s Cauldron consists of several stages, each with its own set of challenges and enemies. Here’s a breakdown of what you can expect from each phase of the dungeon:

1. Entrance and Initial Enemies

Upon entering the Demon’s Cauldron, players are greeted with a fiery atmosphere and numerous lower-tier enemies. These enemies include infernal wolves, demon-possessed humans, and elemental creatures that deal primarily fire damage.

The first challenge is primarily a test of coordination as the group deals with waves of these mobs. Tanks should lead the way, while DPS and healers stay close, taking out enemies as they spawn. Use fire resistance potions here and keep an eye on the terrain, as lava pits can deal significant damage if players stand too close.

2. The Lava Pools and Environmental Hazards

After clearing the first waves of enemies, the group will have to navigate an area filled with lava pools and other environmental hazards. Lava can cause significant burn damage over time, so avoiding it is crucial. In this section, players will need to rely heavily on their movement and positioning.

Some mobs in this area are capable of summoning smaller lava pools, creating even more dangerous areas to navigate. Tanks should be aware of these mechanics and keep enemies positioned away from these hazard zones.

3. The Demon Lords and Mini-Boss Encounters

The heart of the Demon’s Cauldron is a series of mini-bosses leading up to the final encounter. These bosses are demonic creatures that have devastating fire-based attacks and powerful abilities that require precise timing to avoid.

Fire Wave Attacks: Many of these bosses will unleash massive waves of fire that cover large areas. The group will need to spread out, with designated players who can call out the timing of these waves.

Summons and Adds: Some bosses have the ability to summon smaller enemies, which adds an extra layer of difficulty. The tank must manage aggro on both the boss and the adds, while DPS focuses on taking out the summons quickly.

Demonic Fury: Many of the mini-bosses in the Cauldron have a mechanic where their damage increases over time. The group should focus on dealing damage quickly to prevent these bosses from becoming overwhelming.

Each boss encounter is a test of execution, and players should focus on managing fire damage, avoiding large environmental hazards, and dealing consistent damage to the boss.

4. The Final Boss: The Demon Lord

The final boss in the Demon’s Cauldron is a massive, fiery Demon Lord. This encounter is one of the toughest in the game, requiring all members of the group to be on point with their mechanics.

Phase One: The Demon Lord will attack with massive AoE fire abilities that will scorch the ground. Players need to move quickly, staying away from the fire and avoiding direct hits. The Demon Lord will also summon minions, adding extra complexity to the fight.

Phase Two: Once the Demon Lord reaches 50% health, the ground will start to erupt with fire geysers, and the boss will begin to teleport, attacking from different angles. This phase requires excellent coordination, as players must track the boss’s movements and avoid fire zones while continuing to deal damage.

The key to defeating the Demon Lord is constant movement and communication. Tanks need to be ready to pick up adds, while DPS must burn down the boss while avoiding his deadly abilities.

Rewards and Loot

Defeating the final boss of the Demon’s Cauldron rewards players with some of the best loot in New World. Players can expect:

Epic Gear: High-level gear, including weapons, armor, and accessories with powerful attributes and perks.

Artifact Fragments: These can be used to upgrade specific types of gear, further enhancing your character’s power.

Unique Items: The dungeon drops unique, fire-themed gear and collectibles that are only available within the Cauldron.

Azoth: A valuable resource that can be used to enhance your character and crafting professions.

Conclusion

The Demon’s Cauldron is one of the most challenging expeditions in cheap New World Coins, but also one of the most rewarding. It requires excellent teamwork, proper preparation, and a solid understanding of the mechanics to succeed. Whether you’re looking to test your group’s coordination or hunt for high-end loot, this dungeon offers a thrilling and intense experience for endgame players.

Make sure you’re well-prepared, communicate effectively with your team, and take your time to master the encounters. With patience and strategy, you’ll emerge victorious from the Cauldron, with new gear, powerful rewards, and the pride of having conquered one of Aeternum’s most dangerous locations.

Best New World Aeternum Builds

New World, the ambitious MMORPG by Amazon Games, has captivated players with its rich world of Aeternum, a sprawling and mystical land filled with dangers, treasures, and countless opportunities. One of the core features that make New World stand out is its deeply customizable combat and progression system, where players can experiment with a wide array of weapon combinations, skills, and attributes to create builds that suit their playstyle and optimize their effectiveness in PvE and PvP scenarios.

Whether you’re focused on tackling the toughest PvE content, engaging in high-stakes PvP, or simply enjoying the social and crafting aspects of the game, New World offers a vast range of options to explore. In this article, we’ll break down the best builds for different playstyles in New World Gold, covering PvE, PvP, and hybrid builds that maximize efficiency and effectiveness in Aeternum’s dangerous world.

1. PvE Tank Build: Sword and Shield + Hatchet

Overview:

The PvE Tank Build is focused on absorbing damage, maintaining threat control, and keeping enemies focused on you during group fights, particularly in expeditions, elite zones, and wars. For this build, the key is to use the Sword and Shield as your primary weapon for high survivability and damage mitigation, while the Hatchet offers an additional burst of damage and survivability through its Berserk ability.

Core Attributes:

Strength: Main attribute to increase your damage, block efficiency, and survivability.

Constitution: Vital for increasing your health pool and overall survivability.

Dexterity: Optional for improving the efficiency of the Hatchet and increasing critical chance.

Weapon Mastery:

Sword and Shield: The Sword offers a good mix of damage and crowd control with abilities like Shield Bash and Whirling Blade, which can help stun and disable enemies. Defiant Stance is a great defensive cooldown that boosts your damage absorption and reduces threat.

Hatchet: The Hatchet is great for its self-healing ability through Berserk, which also increases your damage output. Raging Torrent gives you mobility and additional burst damage, making the Hatchet a powerful tool for controlling aggro while still contributing significant damage.

Key Skills:

Sword and Shield:

Shield Bash (for crowd control and stunning enemies).

Defiant Stance (boosts survivability and taunts enemies).

Whirling Blade (damage and AoE crowd control).

Hatchet:

Berserk (self-healing and increased damage output).

Raging Torrent (mobility and AoE damage).

Why This Build is Great:

This build is excellent for tanking in dungeons or open-world PvE content. Sword and Shield gives you the tools to hold enemy aggro, while Hatchet allows you to heal and deal damage, making this build both self-sufficient and highly resilient.

2. PvE DPS Build: Greatsword + Firestaff

Overview:

The PvE DPS Build focuses on maximizing damage output in PvE scenarios, such as expeditions, elite zones, and world bosses. This build combines the high burst damage potential of the Firestaff with the utility and raw power of the Greatsword for sustained damage and crowd control. With powerful AoE attacks and massive critical damage, this build shines when dealing with multiple enemies at once.

Core Attributes:

Intelligence: Primary attribute for the Firestaff, increasing magic damage.

Strength: Beneficial for the Greatsword, improving damage and scaling with weapon mastery.

Weapon Mastery:

Firestaff: The Firestaff is perfect for AoE damage with abilities like Pillar of Fire and Flamethrower. Incinerate provides a strong debuff that weakens enemies and synergizes well with the overall damage output.

Greatsword: The Greatsword is one of the highest burst-damage weapons in the game, with abilities like Splitting Strike and Sundering Strike, which help disable enemies and increase your overall damage. The Greatsword excels in sustained single-target damage and AoE.

Key Skills:

Firestaff:

Pillar of Fire (high burst AoE).

Flamethrower (continuous damage).

Incinerate (debuffs enemies and increases damage output).

Greatsword:

Splitting Strike (damage and mobility).

Sundering Strike (reduces enemies’ armor, increasing damage from all sources).

Whirlwind (AoE damage).

Why This Build is Great:

This build offers a versatile mix of AoE and single-target damage, allowing you to excel in dungeons and large PvE battles. The Firestaff gives you reliable damage over time, while the Greatsword gives you high burst potential, enabling you to handle both trash mobs and tougher enemies effectively.

3. PvP 1v1 Duelist Build: Rapier + Musket

Overview:

The PvP Duelist Build is designed for those who want to excel in solo PvP, particularly in 1v1 duels. It focuses on mobility, control, and damage while being able to kite enemies and outplay opponents in a duel. The Rapier offers high burst damage and evasive abilities, while the Musket provides long-range damage and crowd control.

Core Attributes:

Dexterity: Main attribute for the Rapier and Musket, scaling your damage and critical hit chance.

Constitution: Adds survivability and increases your ability to tank hits in a duel.

Weapon Mastery:

Rapier: The Rapier is excellent for high mobility and damage. Abilities like Flurry provide fast, devastating attacks, and Tondo allows you to deal sustained damage over time, while Riposte gives you a parry ability to counter incoming attacks.

Musket: The Musket provides high burst single-target damage with abilities like Trigger Pull for quick kills and Powder Burn to debuff your enemies. The Musket is perfect for players who prefer a hit-and-run playstyle or long-range engagements.

Key Skills:

Rapier:

Flurry (quick burst damage).

Riposte (counterattack and crowd control).

Tondo (damage over time).

Musket:

Trigger Pull (quick burst damage).

Powder Burn (debuffs and reduces enemy mobility).

Musket Shot (long-range poke).

Why This Build is Great:

The Rapier and Musket combination offers exceptional mobility and damage potential in 1v1 PvP encounters. With Riposte to avoid incoming damage and Musket Shot for long-range pokes, this build excels at kiting and outmaneuvering your opponent. It’s perfect for solo PvP encounters where reaction time and positioning are critical.

4. PvP War Build: War Hammer + Void Gauntlet

Overview:

For large-scale PvP, particularly in wars or outpost rushes, you need a build that excels in both crowd control and damage mitigation. The War Hammer combined with the Void Gauntlet offers massive AoE control and utility, allowing you to disable enemies, disrupt enemy formations, and support your team in large battles.

Core Attributes:

Strength: Main attribute for the War Hammer, boosting its damage and crowd control potential.

Intelligence: Boosts the damage and healing of the Void Gauntlet, as well as its debuffing capabilities.

Weapon Mastery:

War Hammer: The War Hammer is an excellent weapon for crowd control in PvP wars. Abilities like Shockwave and Commanding Presence allow you to deal AoE damage and keep enemies stunned, while Gravity Well pulls enemies together for easy follow-up attacks.

Void Gauntlet: The Void Gauntlet is a great weapon for both damage and healing, providing you with a toolkit for debuffing enemies and supporting allies. Void Blade lets you slice through enemies, while Mortal Reach gives you a longer-range AoE attack that can hit multiple enemies at once.

Key Skills:

War Hammer:

Shockwave (AoE damage and crowd control).

Gravity Well (pulls enemies together).

Commanding Presence (boosts ally damage).

Void Gauntlet:

Mortal Reach (AoE damage and debuff).

Void Blade (direct damage).

Petrifying Scream (disables enemies).

Why This Build is Great:

The War Hammer + Void Gauntlet combo is perfect for large-scale PvP. The War Hammer gives you excellent crowd control and the ability to disrupt enemy formations, while the Void Gauntlet offers versatile damage and utility, ensuring you’re useful both as a damage dealer and a support role.

5. Hybrid Build: Bow + Life Staff

Overview:

The Hybrid Build allows you to contribute to both damage and support, making it ideal for solo play or group PvE activities. Combining the Bow for ranged damage with the Life Staff for healing creates a well-rounded build that can adjust to any situation. The hybrid nature ensures that you can switch between DPS and healer roles, which is extremely useful in expeditions or when helping others in world PvP.

Core Attributes:

Dexterity: For Bow damage and ranged attacks.

Wisdom: Increases healing effectiveness with the Life Staff.

Weapon Mastery:

Bow: The Bow excels at ranged combat, with abilities like Poison Shot for debuffs and Rain of Arrows for AoE damage.

Life Staff: The Life Staff allows you to heal allies and yourself while still being able to deal decent damage with abilities like Sacred Ground and Beacon.

Key Skills:

Bow:

Poison Shot (debuff and damage over time).

Rain of Arrows (AoE damage).

Rapid Shot (single-target damage).

Life Staff:

Sacred Ground (healing area).

Beacon (single-target healing).

Divine Blessing (healing buff for allies).

Why This Build is Great:

The Hybrid Bow + Life Staff build is perfect for players who want to adapt to multiple roles depending on the situation. Whether you need to heal your allies or take down enemies at range, this build provides a versatile toolkit for different PvE and PvP encounters.

Conclusion:

New World offers a wide variety of builds that cater to every type of player, whether you prefer to tank, deal damage, support allies, or engage in complex PvP strategies. By choosing a build that complements your playstyle and optimizing your gear, attributes, and weapon masteries, you can fully embrace the challenges and buy New World Gold coins that Aeternum has to offer.

These are just a few examples of some of the best builds currently dominating New World’s various content types. Experiment with these combinations, refine your strategies, and above all, have fun exploring the dynamic world of Aeternum!

New World: How To Farm Rawhide In Rise Of Angry Earth? – Best Locations & Tips

With Rise of Angry Earth expansion, a change of level bracket for Rawhide come in New World, so the farming locations for it have changed quite a bit. But I think there are still a lot of places that have a good potential in farming your preferred hides.

I will tell you some of the best Rawhide farming spots in this short guide. I will also share some general tips to make your run more successful. This way, you can collect more Rawhides and earn more New World Coins.

Understanding Rawhide Farming

Different hides drop from a certain level of a beast, and now these brackets have changed.

Rawhide now drops from beasts from level one up to level 29. At level 30 and above, they will be able to be skinned from thick hide.

The base amount of hides on creature drops is based on two factors: 

The first factor is the size of the beast. Bison drop the most hide as they’re the biggest, and wolves do the least as they are small compared to them. 

The other factor is beast level. The higher the level within the bracket, the more height it drops. For example, a level 25 lynx would give you more Rawhide than a 15 lynx. This base number would reset at the next hide tier bracket.

The whole base amount of hides you get can then be multiplied by gathering yield. You can double it if you optimize correctly. 

Choosing The Right Zone

There are only three zones where you can farm Rawhide. And I would pick your zone depending on the faction ownership as you get 10% more yield if you are the same faction as the one who owns the zone. 

If none of them are your color, then don’t worry and pick any of them you like.

Everfall Rawhide Locations

Everfall is the first one that we will take a look at. This zone has plenty of good locations where you can farm Rawhide.  

There is a good hilly area that is inhabited with a lot of pumas and deer. Both of them give you a lot of Rawhide.

Up North near the border with Weaver’s Fen, you have a green land with wolves wondering about. This one is a bit worse than the previous one with pumas and deer. An equally good area is the one around Starstone Barrows Expedition where, besides Ancient Guardians, you can find plenty of lynxes.

Up North is the worst spot of them all because wolves are very low level. But if you put your time in, you can get a decent amount of Rawhide. 

If I were you, I would try pumas and deer first. If taken, I would move North to wolves or west to lynxs.

Windsward Rawhide Hotspots

The next zone that has enemies low enough for you to be able to haunt animals is Windsward. 

This one has one amazing spot that might be taken all the time. It is the bison spot that also has some deer on the western side, already in the area of Monarch’s Bluffs. This one also has a lot of Hemp. If you were lucky enough to find it, you can farm both at the same time.

Other options are low-level wolves and lynxs on the east of the settlement and wolves, deer, and pumas at the south of the zone’s main town.

By far the best option is where bison reside. However, it might always be taken. In that case, I would try my luck south of the settlement.

Monarch’s Bluffs Rawhide Farms

The last area that has enemies that are up to level 25 is Monarch’s Bluffs.

This one has very few options on where to farm Rawhide. You have a large area filled with wolves and bears. You also have one inside a cave that is filled with lynxes. 

I have not included the bison and deer location as I have already mentioned it in the Windsward part.

If I had to pick where to farm Rawhide in this zone, I would pick the wolves and bear area down South as I believe it is much less populated with other hunters like you. 

Conclusion 

With the change of level bracket, the farming locations for Rawhide have changed quite a bit. 

But I think there are still a lot of places that have a good potential in farming your preferred hides when you go on your run.

Do not forget to buff up with Music to get as much yield as possible.

New World has unveiled a comprehensive guide for players

New World has unveiled a comprehensive guide to help both new and returning players catch up on the intricacies of Aeternum, the captivating game world.

While the guide is more of a summary, it serves as an excellent starting point for those who may have been away from the game for some time. Newcomers can swiftly get up to speed with the fundamentals, thanks to the various sections covered. The guide provides invaluable tips for new players to embark on their journey. ArsheeTV, a contributor to the guide, acknowledges that New World encountered a rocky start with numerous bugs, some of which persist. Nevertheless, the essence of the game remains enjoyable, and new players can now experience New World as it was initially envisioned during its launch.

One of the critical updates highlighted in the guide is the comprehensive overhaul of the main storyline. Most of the game’s zones have been revamped based on player experiences and feedback, with further refinements planned for the new expansion and future updates. The 1 to 40 main story progression has undergone substantial improvements, making it more accessible to players.

The guide also delves into the world of weaponry, offering insights on how to determine the best weapons that suit your playstyle. Additionally, it provides essential information about factions and their significance, explaining the intricacies of Companies and how they function. A comprehensive list is provided, highlighting the available PVP and PVE content.

A dedicated section caters to returning players, ensuring that those who left the game due to initial bugs and issues will have a smoother reentry. The revamped 1 to 40 story progression, along with changes accompanying the expansion that essentially soft-reset gear balance, simplifies the process of catching up. Players can also experiment with weapons to discover which best suits their preferences. With the introduction of the Flail in the new expansion, everyone can experience a fresh element of the game. The guide also covers various features and changes that players may have missed during their absence, including alterations to Mutated Expeditions, the introduction of Heartrunes, and the implementation of gear set storage.

Overall, the New World guide offers a comprehensive resource for players, whether they are stepping into the game for the first time or returning after an absence. It provides valuable insights into the game’s key elements, ensuring that players can navigate the world of Aeternum with confidence and enjoyment.

Quickly buy New world gold coins here: https://www.mmoexp.com/New-world/Coins.html