Category: Path of Exile 2

Path of Exile 2: How to Defeat Azmadi, the Faridun Prince

The Azmadi, the Faridun Prince boss fight in Path of Exile 2 has quickly earned a reputation as one of the campaign’s toughest encounters. Found during the Interlude, this duel-style battle tests your ability to read patterns, dodge combos, and maintain composure under pressure. Azmadi doesn’t rely on random mechanics-he punishes players who mistime dodges or overcommit to attacks. For ranged characters or glass-cannon builds, this fight can feel nearly impossible without understanding his moveset.

Even though Azmadi doesn’t guarantee unique drops beyond the usual rare and Path of Exile 2 Items, the encounter is a mandatory storyline boss required to progress toward the endgame. Defeating him marks a key milestone in mastering both mechanics and character build optimization.

This guide will explain how to locate Azmadi, break down every phase of the fight, and offer the best strategies and gear recommendations to ensure you walk away victorious.

Where to Find Azmadi, the Faridun Prince

You’ll encounter Azmadi during the second Interlude quest of Path of Exile 2. The fight takes place deep within the Qumah Reservoir, an area connected to the Khari Crossing and Galai Gates. The story context ties Azmadi to the ongoing political turmoil involving Asala, the Sekhema of Sekhemas, with Azmadi acting as her rebellious counterpart.

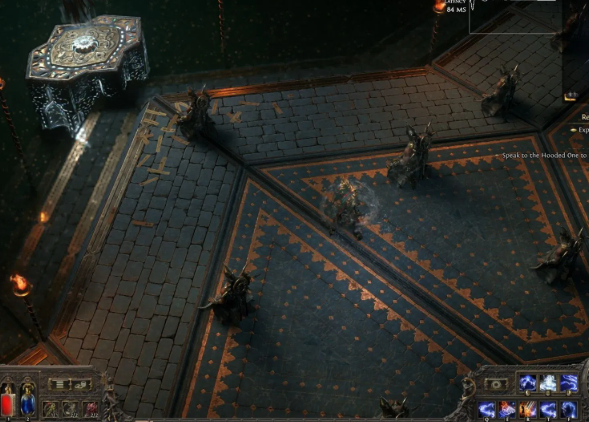
Unlike optional bosses scattered throughout the campaign, Azmadi is unavoidable. The encounter unfolds naturally as you progress through the Interlude. Once you reach the wide-open circular arena in the Reservoir, a cinematic introduces the duel-there’s no turning back.

The arena itself offers plenty of space to move, dodge, and reposition, which is essential for survival. However, the lack of obstacles means you can’t rely on terrain to block his line of attack.

Azmadi’s Attack Patterns and Abilities

Azmadi is a melee-based boss who uses both physical and spectral attacks. His moveset evolves dramatically once the fight reaches phase two, where Zarokh, the Temporal, freezes time to empower him. Recognizing attack animations and keeping your distance at the right moments are the keys to victory.

Here’s a breakdown of Azmadi’s key abilities:

1. Sword Dash – A fast, linear dash followed by a heavy slash. Roll perpendicular to his direction to avoid getting clipped.

2. Single Sword Swing – A simple melee swing, often used as a feint to bait early dodges.

3. Multi-Swing Combo – A rapid three-hit sequence. Don’t roll early-save your dodge for the final swing.

4. Sword Throw – Azmadi throws spectral swords one after another. Each throw tracks your last position, so move laterally.

5. Spectral Heavy Slash – Summons spectral clones before charging up a massive frontal cleave. Roll behind him just before impact.

6. Blink AoE Slash – Teleports around the arena multiple times, each blink creating a damaging shockwave. Stay on the move.

7. Spectral Sword Dash – Summons glowing swords that indicate where he’ll dash next. Roll sideways at the last possible moment.

8. Aerial Slam with Clones – Jumps into the air, spawns illusions, and slams down, releasing multiple wave-shaped slashes.

9. Delayed Three-Hit Combo – Sends three slashing projectiles; the final one is delayed to punish panic dodges.

Once his health drops below 60%, Zarokh intervenes, freezing time briefly before phase two begins. From this point forward, all of Azmadi’s attacks become faster and chain more aggressively, leaving very little margin for error.

Phase One Strategy – Learn and Survive

During the first phase, Azmadi’s movements are slower and easier to read, making it the perfect opportunity to study his combos.

Key Tips:

·Keep mid-range distance. Too far and you’ll bait Sword Throws; too close and you’ll eat combos.

·Dodge toward him during Sword Dashes to end up behind him.

·When he throws swords, move horizontally across the arena instead of backward.

·For ranged builds, circle him while dropping DoTs or traps.

Phase one rewards patience. Focus on landing single hits or DoT skills between his combos rather than spamming attacks.

Phase Two Strategy – Adapt and React

When Zarokh empowers Azmadi, the fight’s tempo doubles. He’ll chain Blink AoE Slashes with Sword Throws and Multi-Swing Combos, creating deadly pressure.

How to Handle Each Attack in Phase Two:

·Spectral Sword Dash: Watch for glowing swords. He’ll dash between them in sequence. Rolling sideways at the last second avoids the AoE explosions.

·Delayed Three-Hit Combo: Time your dodges carefully. Roll through the first two projectiles, then briefly wait before dodging the delayed final wave.

·Aerial Slam with Clones: Don’t retreat. Instead, move behind him or to the sides just before impact to avoid the slashing wave cone.

·Blink AoE Slash: Keep running diagonally around the arena. Standing still will guarantee a hit.

Additional Tips:

·Save flasks for the second phase; it’s far more punishing.

·Maintain vision of him at all times-he often chains teleports into combos.

·Use minions or decoys if your build allows; they can absorb some attacks or redirect his aggro.

Best Builds and Skills for the Azmadi Fight

While any build can defeat Azmadi with enough practice, certain playstyles have an easier time:

·High Mobility Builds (like Ranger or Trickster): Can kite Azmadi easily and reposition quickly during Blink AoEs.

·Totem and Trap Builds: Keep dealing damage even while dodging.

·Tanky Melee Builds: Can punish his recovery windows, but should invest in strong mitigation or block.

Avoid glass-cannon setups unless your reactions are near-perfect. His combos can chain-stun you if you’re caught mid-animation.

Recommended Path of Exile 2 Items for the Fight

Proper preparation makes all the difference. Certain Path of Exile 2 Items can significantly boost survivability or mobility:

·Defensive Flasks: Granite or Jade Flasks for armor/evasion. Consider utility flasks with bleed or stun immunity.

·Movement Boots: Look for increased movement speed and cooldown recovery on dashes.

·Unique Items: Prioritize pieces that grant life gain on hit, damage reduction while moving, or additional resistances.

·Crafted Gear: High resistances (especially chaos and lightning) mitigate some of Azmadi’s secondary effects.

If you’re short on upgrades, many players buy POE2 Items or buy POE2 Currency from trusted in-game marketplaces to optimize their loadouts before tackling tough bosses. Stronger gear not only improves your damage output but also reduces the risk of getting one-shot by combo chains.

How to Mentally Approach the Fight

The Azmadi encounter is as much a mental challenge as a mechanical one. It’s easy to panic after a few failed attempts, but this boss is designed to test timing and patience rather than raw DPS.

·Treat early deaths as study runs. Every defeat teaches you a new pattern.

·Stay calm after being hit. Don’t chain panic-rolls-they’ll get punished.

·Focus on rhythm. Most of Azmadi’s combos have predictable beats once you learn the timing.

Final Thoughts

The Azmadi, the Faridun Prince, who fights in Path of Exile 2, represents a true test of player skill, awareness, and adaptability. Unlike many campaign bosses that can be brute-forced, Azmadi demands precision. His relentless combos, empowered phase, and deceptive telegraphs ensure that careless players are swiftly punished.

However, once you learn his attack rhythm, the fight transforms from chaos into a dance-one where every dodge, roll, and counterattack feels earned.

With the right preparation, optimized Path of Exile 2 Items, and understanding of his moveset, even fragile builds can emerge victorious. The key lies in patience, observation, and confidence. Master the duel, and you’ll not only progress through the Interlude-you’ll prove yourself capable of surviving anything Path of Exile 2 throws at you.
Path of Exile 2:Krutogg,the Kindred Lord Boss Guide

Path of Exile 2 Chapter 4 is packed with hidden challenges,optional bosses,and secret quests for players who explore beyond the main storyline. One standout encounter is Krutog,Lord of Kin-a terrifying,corpse-wielding boss lurking on the Isle of Kin. Though optional,taking him down tests your combat skills and unlocks the Trial of Ancestors side quest,along with valuable loot.Don’t wait for victory-purchase your POE 2 Currency and start ruling a kingdom!

Where to Find Krutog

Krutog isn’t part of the main story,so locating him requires careful exploration:

1.Sail to the Isle of Kin

Use your ship to reach this dangerous island filled with optional content and rewards.

2.The Tyrant Throne Checkpoint

Krutog lair lies deep within the island. This checkpoint marks the entrance to his arena.

3.Nearby Points of Interest

While exploring,keep an eye out for:

Volcanic Warrens Dungeon-Risky but offers rare currency drops.

Primal Arena Checkpoint-Defeat The Blind Beast to gain +2 Passive Weapon Set Skill Points.

Torn Map Piece-Collectible for the Forgotten Bounty quest.

Krutog’s Attack Patterns

At first glance,Krutog arsenal seems straightforward,but his attacks grow increasingly deadly as the fight progresses. He combines heavy melee swings with damaging area effects and lightning-based damage in phase two.

Ground Stomp (Physical)-Hits a radius around him; later adds lightning splash.

Corpse Swing-Sweeps a corpse across melee range.

Corpse Throw-Hurls multiple corpses that explode on impact.

Corpse Slam-Repeated downward corpse smashes.

Gas Breath-Cone-shaped toxic attack dealing physical damage.

Sulphite Vomit (Physical + Lightning DOT)-Leaves a massive damaging puddle on the ground.

Arena Chase-Krutog aggressively chases players around the small arena.

Note:The combination of small arena size,AoE puddles,and fast melee swings makes him especially punishing for melee builds. Ranged players can kite him more safely.

How to Defeat Krutog

1.Stay Mobile

    Krutog attacks often lock him into animations,creating windows for dodging or dealing safe damage. Standing still is a quick path to defeat.

    2.Avoid the Sulphite Puddle

      His Sulphite Vomit is a fight-changer. The puddle deals continuous physical and lightning damage-being cornered here can be deadly. Always keep escape routes open.

      3.Exploit Ranged Advantage

        Bow users,spellcasters,or minion builds can kite Krutog around the arena,avoiding melee attacks while focusing on dodging corpses and puddles.

        4.Prepare Defenses

          For melee or tanky builds:

          Stack Lightning Resistance.

          Bring instant-recovery life flasks for burst damage.

          Improve physical mitigation through armor or endurance charges.

          5.Manage Phases

            At 50% health,Krutog becomes more aggressive:

            Stomps now add lightning splash.

            Chase speed increases,and puddle placement intensifies.

            Conserve flasks,movement skills,and defensive abilities for this stage.

            Rewards and Progression

            Defeating Krutog yields more than personal satisfaction:

            Trial of Ancestors Side Quest-Start this lore-rich quest by interacting with the nearby cage after the fight.

            Loot-Mid-game gear,rare drops,and a chance for unique items. For a smoother gear progression,consider acquiring buy POE2 Currency.

            Character Growth-Between skill point rewards,Torn Map Pieces,and side quests on the Isle of Kin,defeating Krutog helps build a stronger late-game character.

            Krutog,Lord of Kin,punishes overconfidence. While not the hardest Chapter 4 boss,his heavy melee,lightning AoEs,and arena control can overwhelm the unprepared. Key to success:stay mobile,manage resistances,respect phase two mechanics,and use ranged advantage if possible. Master these,and Krutog will join the list of fallen tyrants on the Isle of Kin.

            Path of Exile 2: Witch Class Breakdown

            In Path of Exile 2, the dark and dangerous world of Wraeclast returns with new systems, fresh visuals, and refined gameplay—but some things never change. The Witch remains one of the most iconic and powerful classes for players who prefer devastating magic, sinister curses, and an army of undead at their command.Power up your builds – get POE 2 Currency from MMOexp.

            Why Choose the Witch in Path of Exile 2?

            The Witch is a high-risk, high-reward archetype focused on spellcasting, summoning, and controlling the battlefield. Drawing comparisons to the classic Necromancer from Diablo II, she brings a mix of raw magical firepower and intricate utility that rewards thoughtful, strategic play.

            Key Strengths of the Witch

            1.Versatile Spell Arsenal

              The Witch excels at manipulating the battlefield through chaos damage and debuff-heavy curses. Her toolkit includes spells like Contagion and Despair, which spread damage over time while softening up enemies for further punishment. Whether you’re nuking packs or softening up bosses, her diverse magic options are a core strength.

              2.Commander of Spirits

                With the introduction of the spirit system in PoE 2, the Witch’s minion gameplay is deeper and more customizable than ever. She can summon a range of spectral allies who not only deal damage but also shield her from incoming threats. Building around minions lets players maintain pressure on enemies while staying safe in the backline.

                3.Utility and Support Prowess

                  The Witch isn’t just a damage dealer—she thrives as a tactical support character. Through curses and crowd control effects, she weakens enemies and sets up allies for big plays. Additionally, she can buff or heal her minions, creating a robust frontline that helps any party succeed in challenging encounters.

                  4.High-End Damage Scaling

                    When optimized, the Witch can rival the top DPS builds in the game. With well-planned passive tree paths and proper gear, players can pivot from a support-heavy playstyle to a direct-damage powerhouse using high-impact spells. The freedom to alternate between summoner and nuker builds keeps her gameplay loop engaging and flexible.

                    Witch Weaknesses to Watch Out For

                    1.Sluggish Early Levels

                      New Witch players might find the early campaign challenging. Without powerful minions or gear, her initial damage can feel underwhelming. Early survivability also depends heavily on learning positioning and timing, making her less forgiving than melee or tankier classes.

                      2.Glass Cannon Tendencies

                        The Witch lacks natural defenses, making her vulnerable to burst damage and boss mechanics that punish slow reactions. Success often hinges on smart use of movement, curses, and minion aggro to avoid becoming an easy target.

                        3.Tricky Boss Encounters

                          While minions excel in map-clearing and skirmishes, they can fall short during high-mobility boss fights. Relying too heavily on summons may leave the Witch exposed when faced with bosses that require precision dodging and personal damage output.

                          4.Heavily Gear Dependent

                            Like most advanced builds in PoE 2, the Witch’s true potential is unlocked through careful gear selection. Minion builds in particular demand very specific items to scale effectively, which can create hurdles for newer players or those without consistent access to powerful loot.

                            The Witch class in Path of Exile 2 offers a compelling mix of dark fantasy, tactical gameplay, and magical dominance. Whether you’re orchestrating an undead army or hurling devastating spells from the backline, she brings unmatched depth and flair to the battlefield. But with that power comes the need for patience, planning, and a keen sense of timing. Master the Witch, and you’ll wield one of the most flexible and rewarding playstyles in the game.Level up your game – buy POE 2 Exalted Orbs at unbeatable prices!

                            How to Efficiently Farm Path of Exile 2 Divine Orbs in the Temple of Chaos

                            Path of Exile 2 is shaping up to be one of the most anticipated ARPG releases, bringing with it new endgame challenges, bosses, and powerful rewards. One of the most essential currencies in the game remains POE 2 Divine Orbs, a staple for crafting and trading in the in-game economy. Many players have been searching for reliable ways to farm these orbs efficiently, and today, we will break down one of the best farming methods currently available: The Temple of Chaos.

                            In this guide, we’ll cover everything you need to know about farming Divine Orbs through the Temple of Chaos, including drop rates, optimal strategies, and profit calculations. Let’s dive in!

                            Why Choose the Temple of Chaos?

                            The Temple of Chaos is an endgame zone that offers high rewards for those who can complete its challenges. Here’s why it stands out as one of the most consistent and efficient Divine Orb farms:

                            1. Fast Runs with Big Payouts

                            • Each run takes only 12 to 13 minutes to complete.
                            • In just 10 runs, it’s possible to farm an average of 9 Divine Orbs and 42 Exalted Orbs.
                            • That translates to roughly 4.5 Divine Orbs per hour, making it one of the best farming methods for steady currency income.
                            • Unlike RNG-heavy farming strategies, this method is repeatable and consistent, ensuring reliable returns.

                            2. Soul Cores: The Real Money Makers

                            • The biggest profit source in this method comes from Soul Cores.
                            • Every time you clear the Temple of Chaos, you are guaranteed to receive at least three Soul Cores.
                            • These sell consistently for good currency on the trade market.
                            • If you’re lucky, you may drop an Asapa Escapa Soul Core, which sells for around three Divine Orbs, significantly boosting your earnings.

                            3. Boss Drops: The Fate Rewards

                            • The final boss on Round 10 drops Deadly, Cowardly, or Victorious Fates.
                            • These Fates are not only valuable currency items but also serve as an entry key to fight the Trial Master Boss, who offers even greater reward potential.

                            Farming Strategy: How to Maximize Profits

                            Understanding the Trial of Chaos

                            The Trial of Chaos is a gauntlet-style event where players must complete a series of encounters, each with different objectives. These can include:

                            • Eliminating all enemies
                            • Escorting a statue
                            • Retrieving Soul Cores

                            However, what makes this challenge unique is the addition of Tribulations.

                            What Are Tribulations?

                            • Tribulations are modifiers applied to the player throughout the trial.
                            • Each run starts with the player selecting one of three possible Tribulations before beginning their first combat room.
                            • After completing a room, the chosen Tribulation carries over to the next encounter.
                            • Some Tribulations are minor inconveniences, while others can make the trial significantly more difficult.

                            Tribulations to Avoid

                            While the optimal choice depends on your build and playstyle, some of the most punishing Tribulations include:

                            1. May Strength Chaos – Drastically reduces your armor and evasion.
                            2. Mana Void – Limits mana regeneration and effectiveness of mana leech.
                            3. Corrupting Bloodstorm – Enemies apply stacking bleed effects that can quickly drain your health.

                            Avoiding these modifiers can make your runs much smoother and faster, increasing your efficiency and overall earnings.

                            How to Access the Trial of Chaos

                            To enter the Temple of Chaos, you need an Inscribed Ultimatum with 10 Rounds or 10 Trials. These can be purchased directly from the PoE trade site for around 1 to 2 Exalted Orbs each.

                            Profit Breakdown: Tracking the Loot

                            Summary of Results:

                            • Total Divine Orbs: 9
                            • Total Exalted Orbs: 42
                            • Total Soul Cores: 30 (guaranteed 3 per run)
                            • Total Fates: 3
                            • Total time spent: ~130 minutes (~12-13 minutes per run)
                            • Divine Orbs per hour: 4.5

                            Compared to other currency farming methods, this rivals some of the best endgame bossing strategies without requiring specific high-value drops.

                            Conclusion: Is This Farming Method Worth It?

                            Absolutely! Farming Divine Orbs in the Temple of Chaos provides one of the most consistent, repeatable, and profitable farming strategies in Path of Exile 2. Unlike RNG-reliant methods, this strategy ensures a steady influx of currency, making it ideal for players looking to finance their builds or trade efficiently.

                            Key Takeaways:

                            ✅ Fast and efficient – 12 to 13-minute runs with minimal downtime. ✅ Guaranteed currency – Every run provides Soul Cores and Exalted Orbs. ✅ Highly profitable – 4.5 Divine Orbs per hour. ✅ Minimal RNG reliance – Unlike Heist or Delirium farming, where returns are inconsistent, this method offers stable and predictable earnings.

                            If this guide helped you optimize your Divine Orb farming, be sure to drop a like and share your own experiences in the comments! I’ll be testing out even more currency strategies soon or buying Path of Exile 2 Currency.

                            Path of Exile 2: Where to Find the Devourer

                            Path of Exile 2, the highly anticipated sequel to Path of Exile, has captured the attention of action RPG enthusiasts around the world. With its deep lore, complex gameplay mechanics, and ever-evolving world, the game continues to offer thrilling experiences. One of the many exciting features of Path of Exile 2 is its rich variety of monsters, each offering unique challenges and rewards. Among the most iconic and dangerous creatures players will encounter is The Devourer.

                            In this article, we will delve into the lore, mechanics, and strategies for finding and defeating The Devourer in Poe 2 trade. From the creature’s backstory to its location and how to tackle it effectively, we’ve got you covered in your hunt for this formidable foe.

                            Introduction to The Devourer: A Legendary Monster

                            The Devourer is one of the most terrifying entities in the Path of Exile universe. As with many other creatures in the game, it is tied to the deep lore of Wraeclast and represents a force of immense power. The Devourer is a grotesque, multi-headed creature that feeds on the very essence of the world around it, devouring both life and energy. Its appearance alone is enough to send chills down the spine of any adventurer foolish enough to cross its path.

                            In Path of Exile 2, the Devourer takes on an even more significant role, appearing in a variety of contexts, from terrifying boss battles to pivotal story moments. Understanding its origins and the narrative significance of this creature is important for players who want to fully immerse themselves in the world of Wraeclast.

                            The Lore of The Devourer

                            The Devourer is not just another monstrous adversary in Path of Exile 2; it is deeply tied to the game’s overarching lore. The Devourer, known by many names throughout Wraeclast, is said to have originated in ancient times as a creature born of pure destruction. Some ancient texts refer to it as “The Hunger,” a being of insatiable desire whose only purpose is to consume anything and everything in its path.

                            In the world of Wraeclast, the Devourer is often associated with the spread of corruption and decay. It is said that the creature feeds on the very essence of the world, leaving destruction in its wake. Its presence is usually a harbinger of impending doom, marking areas where the boundaries between life and death begin to blur. Many of the game’s factions, including the Order of the Labyrinth, have long studied The Devourer in an attempt to understand its dark power, but few have lived to share their findings.

                            Where to Find The Devourer in Path of Exile 2

                            The Devourer can be found in a few specific locations throughout Path of Exile 2, often tied to significant story beats or endgame content. Here’s where you can expect to encounter it:

                            1. The Devouring Depths: A Hidden Cave System

                            One of the primary locations where players will face the Devourer is in the Devouring Depths, a vast underground network of tunnels and caves. This area is found deep within the Marshes of Sarn, Act 3’s expansive swampy region. The Devouring Depths is a place where the very earth seems to be consumed by an otherworldly hunger, with roots and plants twisted into grotesque forms as if trying to escape the creature’s influence.

                            To find the Devouring Depths, you will need to venture into the heart of the Marshes of Sarn. The area is initially unlocked after completing several quests tied to the Act 3 storyline. As you explore the marshlands, look for an unassuming cave entrance, shrouded by overgrown flora and darkened by the oppressive air of corruption. Once inside, you’ll notice the cavernous passages twist and turn in confusing patterns, leading you deeper into the heart of The Devourer’s lair.

                            The Devouring Depths is notorious for its dangerous monsters, including corrupted plant life, massive insectoid creatures, and other horrors spawned by the creature’s presence. The atmosphere is thick with an unnatural fog, and players must be cautious as they navigate the dark and treacherous paths.

                            2. The Eternal Hunger Arena: Endgame Challenge

                            In addition to its role in the story, The Devourer also plays a key part in the Endgame Challenge Arena, an optional endgame zone that unlocks after completing Act 6. This area is designed for high-level players looking for an ultimate test of skill and strength.

                            The Eternal Hunger Arena is a dynamic and ever-changing environment where players can challenge The Devourer and its minions in a battle for survival. Unlike traditional boss encounters, the arena is designed to be a constantly shifting battlefield where players must adapt to new dangers and environmental changes. The Devourer in this arena is even more powerful than in its initial appearance, and players will need to work together (if in a party) or rely on their wits to overcome it.

                            The arena is unlocked via a special questline tied to one of the factions in the game. Once completed, players can enterthe arena and face off against the Devourer for high-tier loot and special crafting materials. Defeating The Devourer in the arena grants access to powerful items and unique rewards that can significantly enhance a player’s abilities.

                            3. The Hollowed Caverns: Corruption and Devouring Forces

                            Another area where you can encounter the Devourer is in the Hollowed Caverns, a corrupted area found in Act 5, which becomes more significant in Path of Exile 2 due to the increased focus on corruption and decay. The Hollowed Caverns were once home to a thriving ancient civilization, but after The Devourer’s awakening, the area has become a den of monstrous creatures and horrors.

                            In this cavernous zone, the Devourer takes on a more monstrous form, surrounded by an army of grotesque abominations and corrupted beasts. The Hollowed Caverns is full of hidden alcoves and traps, and the Devourer is often lurking in the deepest, most dangerous parts of the cavern, requiring players to fight their way through waves of enemies before reaching the boss.

                            How to Defeat The Devourer

                            The Devourer is no ordinary boss; it is a complex and challenging encounter that requires preparation, skill, and an understanding of its unique mechanics. Here are some strategies for defeating it:

                            1. Understanding the Devourer’s Attack Patterns

                            The Devourer has several key attack patterns that players need to be aware of. Its primary mode of attack is devouring energy, where it unleashes waves of corruptive energy that drain your health and resources. Players should focus on evading these attacks by keeping a safe distance or using mobility skills.

                            In addition, The Devourer can summon corrupted minions, which should be dealt with swiftly. These minions are often tougher than standard enemies and can overwhelm unprepared players if left unchecked. Use area-of-effect (AoE) skills to eliminate them before focusing back on The Devourer.

                            2. Use of Buffs and Debuffs

                            To survive The Devourer’s onslaught, it is critical to have poison and energy resistance buffs in place. The Devourer deals significant poison damage, and players need to ensure they have the appropriate resistance gear to withstand these attacks. Additionally, applying debuffs to the Devourer, such as reducing its damage or increasing its vulnerability to certain elements, can make the battle much easier.

                            3. Environmental Hazards

                            Be cautious of the environmental hazards that will be present during the fight, especially in areas like the Hollowed Caverns and the Devouring Depths. The ground may become corrupted during the fight, and stepping into certain zones can deal additional damage. Always keep an eye on your surroundings and avoid standing in corrupted patches.

                            4. Prepare for Multiple Phases

                            The Devourer encounter consists of several phases, each more difficult than the last. As the fight progresses, The Devourer becomes more aggressive, summoning stronger minions and using more devastating attacks. Players should adapt their strategy with each phase and stay focused on evading attacks while dealing consistent damage.

                            Conclusion

                            The Devourer is one of the most memorable and challenging creatures in cheap POE 2 Chaos Orbs. Its monstrous presence in the world of Wraeclast serves as both a testament to the game’s rich lore and as an intimidating force that players will need to overcome in their journey. Whether you encounter it in the Devouring Depths, the Hollowed Caverns, or the Eternal Hunger Arena, defeating The Devourer will test your skill and strategy.

                            By understanding its origins, learning its attack patterns, and preparing for the encounter, you’ll be ready to take on one of the most formidable enemies in the Path of Exile universe. Good luck, exile—may your path be illuminated by the light of victory.