
Call of Duty:Black Ops 7 – Nightmare Boss Tips and Tactics

Black Ops 7 delivers some of the most punishing encounters in Call of Duty history, and The Nightmare stands out as one of the most demanding boss fights in the campaign.This battle pushes players to master weak-point targeting, enemy control, and constant movement.Whether you’re tackling it solo in the campaign or refining your skills in Black Ops 7 Bot Lobbies to improve aim and positioning, understanding the fight structure is essential.

The Nightmare appears during a late-game campaign mission and serves as a final mechanics check before the story reaches its conclusion.By this point, the game expects you to manage multiple threats at once while reacting quickly to changing attack patterns.

The Nightmare is a massive plant-like entity rooted to the battlefield.You cannot damage it freely—only specific weak points are vulnerable at certain times.Attacking the wrong areas wastes ammo and exposes you to unnecessary danger.

Phase One – Destroy the Small Flower Buds

At the start of the fight, several small flower buds are visible along the boss’s stalk.These growths resemble enemies you’ve already dealt with earlier in the mission.

Phase One Strategy

Target only the small buds—they are the sole damage sources

Each destroyed bud removes a large portion of the boss health

Maintain distance and keep rotating positions to avoid attacks

Ignoring these buds or firing at the main body will not progress the fight.

Best Weapons for Phase One

Sniper rifles

Designated marksman rifles

Long-range assault rifles

Accuracy and range are more important than raw damage output.

Phase One Attacks and Counters

During this phase, The Nightmare alternates between two primary attacks.

Toxic Gas Wave

The boss emits a spreading cloud of poison that:

Inflicts heavy damage

Knocks players backward

Forces them out of cover

How to counter:Use tall environmental objects as shields and step behind them just before the gas reaches you.

Tracking Energy Pods

Glowing projectiles slowly chase your position.

How to counter:

Sprint away to break line of sight

Or destroy them mid-air before they reach you

Avoid letting multiple projectiles trail behind you at once.

Once all small buds are destroyed, the boss becomes invulnerable and transitions into the next phase.

Phase Two – Survive the Enemy Swarms

With its weak points sealed, The Nightmare summons large waves of enemies, including:

Regular zombies

Mutated spiders

Explosive variants

Your Objective

Stay alive until the boss immunity ends.

Phase Two Survival Tips

Keep moving at all times to avoid being surrounded

Use grenades and abilities to control crowd size

Save precision ammo by switching to SMGs, shotguns, or explosives

When the shield drops, another set of small buds appears.Destroy them again while continuing to handle constant enemy pressure.

Many players practice this phase in Black Ops 7 Bot Lobbies to improve crowd control, pathing, and movement discipline before attempting it in the campaign.

Final Phase – Attack the Glowing Core Flowers

Once The Nightmare health drops to roughly one-third, the fight enters its final stage.Small buds stop appearing, and three massive flower mouths emerge on the boss body.

How the Final Weak Points Work

Each large flower glows orange before attacking

The glow signals a brief vulnerability window

Shooting the glowing mouth deals massive damage

This phase combines weak-point timing with relentless enemy pressure.

Final Phase Survival Strategy

Rotate between cover positions constantly

Avoid tunnel vision—zombies will flank you quickly

Continue dodging poison attacks and tracking projectiles

Only fire when weak points are active

Recommended Ability:Grenade Launcher

Clears large enemy groups instantly

Deals heavy damage to glowing flower mouths

Creates breathing room during high-pressure moments

If you’ve been conserving explosives or abilities, this is the moment to use them.

Ending the Fight

Each large flower mouth can only be damaged for a limited time.When enough damage is dealt:

The flower collapses

The glow disappears

That weak point becomes immune

Immediately shift focus to the next glowing flower.After all three are destroyed, The Nightmare collapses, triggering a cutscene and completing the mission.

Tips to Make the Fight Easier

1.Constant movement is essential

2.Only shoot active weak points

3.Save explosives for the final phase

4.Use long-range weapons early and burst damage late

5.Clear enemies quickly to avoid being overwhelmed

6.Use environmental cover to block poison attacks

The Nightmare boss fight is one of the most distinctive encounters in Call of Duty:Black Ops 7.By combining precision targeting, enemy wave management, and environmental awareness, it forces players to approach combat more strategically than in standard missions.Get ahead before it counts. MMOexp buy CoD Black Ops 7 Bot Lobbies help you build consistency, confidence, and skill—so you’re ready when the real matches begin.

Diablo 4 Season 11: Fastest Way to Complete the Invading Forces Seasonal Objective

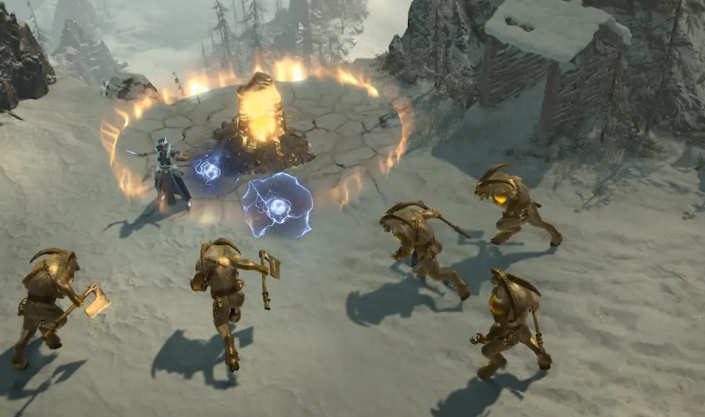
Diablo 4 Season 11 introduces a wealth of seasonal objectives, designed to guide players into fresh content, test their combat skills, and reward endgame progression. Among these objectives, Invading Forces has emerged as a common source of frustration for many players. While it requires defeating specific enemies with rare affixes, their inconsistent spawns make the task feel grindy-unless you know the right approach.

This guide breaks down the fastest, most efficient way to complete Invading Forces, including optimal locations, party strategies, and tips to maximize progress while minimizing frustration.

What Is the Invading Forces’ Seasonal Objective?

The Invading Forces’ objective tasks players with defeating 200 enemies that possess one of the following affixes:

·Infested

·Illusory

·Anguished Souls

·Sinful Torment

Players must complete this objective on Hard difficulty or higher, and the enemies can appear in multiple content types, including dungeons, overworld events, and open-world encounters.

The main challenge arises from the inconsistent spawn rate. Many players find themselves roaming large areas with few eligible enemies, making traditional farming methods inefficient and time-consuming.

The Fastest Way to Complete Invading Forces: Farm The Undercity

The single most efficient method for completing Invading Forces is by farming The Undercity in a party. This strategy leverages enemy density, affix spawn frequency, and group kill credit to accelerate progression dramatically.

Why The Undercity Works So Well

The Undercity is densely packed with enemies, and many of these monsters frequently roll the required Invading Forces affixes. Compared to hunting isolated spawns in open-world content, you’re constantly surrounded by eligible enemies.

Practical results show that in just a few Undercity runs, players can go from single-digit progress to over 50 kills toward the objective. Because the runs are short, repeatable, and tightly packed, you can chain them back-to-back until the objective is complete.

Play in a Party for Maximum Efficiency

While the objective can technically be completed solo, group play dramatically increases speed.

Benefits of Party Farming:

·Faster clears due to the combined damage output

·More enemies defeated per minute

·Kill credit is shared as long as you remain nearby

·Easier survivability at Hard difficulty

Even support or lower-geared characters benefit because proximity to combat counts toward the objective. Forming a party is straightforward, even during off-hours, and creating a group with players focused on seasonal objectives ensures maximum efficiency.

Additional Benefits of Undercity Farming

Farming The Undercity provides more than just Invading Forces progress. Players also enjoy:

1. Seasonal Reputation Progress

·Repeated runs contribute toward seasonal reputation rewards.

2. Divine Gift Progression

·Repeated runs contribute toward seasonal reputation rewards.

3. Experience and Loot

·Andariel’s Divine Gift naturally levels during Undercity runs.

·The Undercity remains a prime source of XP, crafting materials, and rare Diablo 4 Items.

This means you’re actively improving your character while completing the objective, making it a double-benefit activity without the need for external shortcuts, such as buying Diablo IV Items.

Recommended Setup and Tips

The Invading Forces objective only requires Hard difficulty or higher, so there’s no need to risk higher Torment tiers unless chasing loot.

Optimal Setup:

·Play on Hard difficulty for speed and safety

·Use AoE-heavy builds to clear enemies quickly

·Stay close to your party for kill credit

·Don’t rush exits until all nearby enemies are defeated

Prioritize movement speed and area damage, as this reduces downtime and maximizes enemy kills per run.

How Long Will It Take?

Using the Undercity group farming method, most players can complete Invading Forces in under an hour. Efficient groups with AoE builds often finish even faster, making this approach far superior to random dungeon farming or open-world hunting, which can take several hours.

Final Thoughts

The Invading Forces seasonal objective in Diablo 4 Season 11 may initially appear tedious, but knowing the right method transforms it into a fast, rewarding task. By focusing on Undercity farming in a party, you can quickly rack up kills, earn seasonal reputation, and progress through other objectives simultaneously.

Stop wasting time hunting scattered enemies in open-world zones. Instead, group up, head to The Undercity, and complete Invading Forces quickly and efficiently. This method not only saves time but also enhances your overall endgame progression, making Season 11 a smoother and more enjoyable experience.

 How to Play the Strongest Shotgun in Call of Duty: Black Ops 7

Call of Duty has a long and colorful history of launching with at least one weapon so powerful that it ends up defining the early meta. Call of Duty: Black Ops 7 is no exception-and this year’s standout is a shotgun so dominant that it reshapes how you build your class from the ground up.

Whether you’re trying to crush your lobbies or planning to buy CoD Black Ops 7 Bot Lobbies to practice your aim, positioning, and movement, the M10 Breacher is the most reliable weapon to build around right now. If you want unmatched close-quarters power, nothing in Black Ops 7 currently competes with it.

The M10 Breacher: Black Ops 7’s First OP Weapon of the Year

Unlocked immediately and fully customizable from level 4, the M10 Breacher has quickly carved out a reputation as the most fearsome close-range weapon in Black Ops 7. Not only is it the best shotgun available, but it might also be one of the most oppressive shotguns the franchise has ever launched with.

What makes the Breacher truly special is its unique charge mechanic. Holding down the trigger compresses its pellet spread into a hyper-tight burst, turning its standard blast into something far more devastating. The payoff is enormous:

·Consistent one-shot kills within close range

·Minimal pellet spread when charged

·Extremely fast TTK in interior combat

·Reliable performance, especially in chaotic CQB fights

Against competitors like the Echo 12, which unlocks later in progression, the M10 Breacher stands out as a weapon designed for pure room-clearing dominance. However, this power comes at a price: a significant fall-off outside 10-15 feet. Like most shotguns, its range limitations are severe-but when you play to its strengths, nothing else outclasses it.

Why Overkill Is Mandatory for an M10 Breacher Loadout

As powerful as the M10 Breacher is, it remains a heavily specialized weapon. Shotguns in CoD have always been about situational control, and that principle is even more important in Black Ops 7’s faster, tighter map design.

This is where the Overkill Wildcard becomes an essential part of optimizing your class setup. Returning from Black Ops 2, Overkill unlocks at level 20 and allows you to equip a second primary weapon in your secondary slot. For most players, this drastically changes how their class performs.

Running Overkill with the M10 Breacher lets you dominate:

·Tight hallways

·Objective rooms

·Flanking corridors

·Interior control zones

·Short-range crossfires

But the real strength lies in pairing the Breacher with a reliable mid-range primary. This gives you:

·Long-range coverage

·Instant CQB deletion power

·Consistent fragging potential across every engagement distance

The current meta pairs the M10 Breacher best with:

·M8A1 – unmatched precision and range

·M15 Mod 0 – versatile, stable all-rounder

·Dravec 45 – ideal for aggressive rush players

Whether you’re grinding the ranked ladder or using Call of Duty Black Ops 7 Bot Lobbies to fine-tune your setups, Overkill + M10 Breacher remains a top-tier strategy in early BO7.

Best M10 Breacher Loadout in Black Ops 7

To maximize this shotgun’s already absurd potential, you’ll want attachments that emphasize:

·Faster sprint-to-fire

·Better ADS speed

·Tighter spread

·Faster charge rate

·Improved movement

Here’s the strongest M10 Breacher setup for the current patch:

1. Muzzle – Breacher Precision Choke (Lvl 16)

Massively tightens pellet spread, drastically improving one-shot consistency.

2. Barrel – 17.4″ Redwell-5K Barrel (Lvl 14)

Extends range, enhances charge effectiveness, and stabilizes damage output.

3. Stock – Collapsible Stock (Lvl 13)

Cuts down ADS time and sprint-to-fire delays, making charged shots faster to execute.

4. Underbarrel – Redwell Dash Handstop (Lvl 23)

Boosts handling, movement speed, and general responsiveness-critical for a rush weapon.

5. Fire Mod – Pump Guide Rod (Lvl 35)

Improves firing stability and consistency during rapid engagements.

Altogether, this is the most lethal shotgun configuration available at launch.

Best Perks for an M10 Breacher Overkill Build

Your perks should support fast movement, quick weapon cycling, and aggressive entries.

Perk Slot 1: Gung Ho

Allows sprint-to-fire during a charge, enabling unstoppable rush plays and slide-aggression tactics.

Perk Slot 2: Fast Hands

A must-pick when using Overkill. The faster weapon swap allows you to instantly switch from your AR/marksman rifle to the Breacher mid-push.

Final Thoughts

The moment you load into your first lobby of Call of Duty: Black Ops 7, you’ll quickly notice the M10 Breacher’s overwhelming power. With unmatched close-range lethality and one of the most effective charge mechanics in CoD history, this shotgun dominates interior fights and objective play like no other early-meta weapon.

Path of Exile 3.27:Assassin Ascendancy Rework – Complete Overview

The long-anticipated rework of the Assassin Ascendancy has finally arrived with Path of Exile 3.27:Keepers of the Flame. As one of the Shadow signature subclasses, Assassin has long embodied critical precision and deadly poison scaling – yet it remained virtually unchanged since 2019. Once the go-to for high-risk, high-reward gameplay, it gradually fell behind as Trickster and Saboteur evolved with better defenses and smoother mechanics.

1.The New Assassin Identity

    The 3.27 rework redefines how Assassin characters scale both Critical Strikes and Poison, while offering players new tools to stay alive in endgame encounters. Instead of being a pure burst-damage specialist, the Assassin now focuses on precision, execution, and adaptability.

    Two key new keystones shape the subclass’s offensive identity:

    Knife in the Back:Specializes in dealing devastating blows to healthy enemies, granting huge boosts to Critical Strike Chance and Multiplier. Perfect for opening engagements or clearing mobs efficiently.

    For the Jugular:Reverses that power dynamic – amplifying your killing potential against low-life targets. Ideal for boss fights or clutch end-phase executions.

    Both nodes also feature Culling Strike, automatically finishing enemies below 10% health. This ensures every encounter ends with a clean, lethal strike worthy of a master assassin.

    2.Classic Passives Removed and Reworked

      The overhaul removes or replaces several outdated notables – including Deadly Infusion, Ambush and Assassinate, and Noxious Strike – to make room for a more cohesive modern toolkit.

      Meanwhile, Mistwalker, one of Assassin core defensive tools, now grants 100% increased Elusive Effect (up from 50%), effectively doubling its evasion and damage reduction potential.

      3.New Passives for Modern Combat

        Patch 3.27 introduces a lineup of entirely new passives that significantly expand Assassin’s versatility and build diversity:

        Infused Toxins:Grants “All Damage from Hits can Poison,” allowing even Elemental or Chaos-focused builds to fully benefit from poison scaling. This opens the door for hybrid and conversion builds never before possible.

        Deathmarked:Automatically applies a high-level Assassin Mark on Critical Strike when hitting Rare or Unique enemies – no mana, no setup, and near-constant uptime in boss fights.Get ready for greatness—buy POE currency on MMOexp now!

        Mystical Infusion:Transfers your main-hand weapon Base Critical Strike Chance to your spells, empowering hybrid builds that blend melee, bow, or spell damage for unique synergies.

        Shadowed Blood:A groundbreaking defensive node that recoups 40% of Physical Damage taken as Life and makes you Unaffected by Damaging Ailments like Bleed or Ignite. This drastically improves sustain and survivability.

        Opportunistic (Reworked):Reduces damage taken by 35% when facing two or more Rare or Unique enemies – a massive benefit during pinnacle and Uber boss encounters.

        Together, these changes transform the Assassin into a well-rounded hybrid killer – capable of dishing out immense damage while sustaining through heavy punishment.

        4.Build Diversity and Meta Impact

          With this rework, Poison and Critical Strike builds are making a dramatic return to relevance. Players who invest in Critical Strike gear, Chaos Damage multipliers, or Elusive modifiers will find the new Assassin extremely rewarding to min-max.

          However, the biggest winners may be the unconventional builds that the rework enables:

          Spell Crit Assassins, combining Mystical Infusion with poison-based spells.

          Hybrid Attack + Spell setups, using shared Crit scaling for massive synergy.

          Dual Claw or Dagger Lifesteal builds, leveraging Shadowed Blood for sustainability.

          With Trickster receiving noticeable nerfs in patch 3.27, Assassin could easily reclaim its former position as one of the top-tier DPS Ascendancies in the game.

          5.The Assassin Return to Dominance

            The 3.27 rework is more than a balance update-it’s a full redesign that brings Assassin up to modern Path of Exile standards. By reinforcing its thematic strengths-precision, speed, and lethal efficiency – while fixing its weaknesses, the Ascendancy finally feels relevant in every stage of progression.

            Veteran players will find renewed excitement in revisiting Crit Dagger or Poison builds, while newcomers can now enjoy an agile, self-sustaining playstyle that isn’t limited by paper-thin defenses.

            And with the release of ten new Bloodline Ascendancies in Keepers of the Flame, the Assassin synergy potential is set to grow even further. Players looking to push their characters to the limit should start gathering Path of Exile Items and buy Path of exile currency early – these nodes and mechanics heavily reward deep investment in optimized gear.

            Path of Exile 2: How to Defeat Azmadi, the Faridun Prince

            The Azmadi, the Faridun Prince boss fight in Path of Exile 2 has quickly earned a reputation as one of the campaign’s toughest encounters. Found during the Interlude, this duel-style battle tests your ability to read patterns, dodge combos, and maintain composure under pressure. Azmadi doesn’t rely on random mechanics-he punishes players who mistime dodges or overcommit to attacks. For ranged characters or glass-cannon builds, this fight can feel nearly impossible without understanding his moveset.

            Even though Azmadi doesn’t guarantee unique drops beyond the usual rare and Path of Exile 2 Items, the encounter is a mandatory storyline boss required to progress toward the endgame. Defeating him marks a key milestone in mastering both mechanics and character build optimization.

            This guide will explain how to locate Azmadi, break down every phase of the fight, and offer the best strategies and gear recommendations to ensure you walk away victorious.

            Where to Find Azmadi, the Faridun Prince

            You’ll encounter Azmadi during the second Interlude quest of Path of Exile 2. The fight takes place deep within the Qumah Reservoir, an area connected to the Khari Crossing and Galai Gates. The story context ties Azmadi to the ongoing political turmoil involving Asala, the Sekhema of Sekhemas, with Azmadi acting as her rebellious counterpart.

            Unlike optional bosses scattered throughout the campaign, Azmadi is unavoidable. The encounter unfolds naturally as you progress through the Interlude. Once you reach the wide-open circular arena in the Reservoir, a cinematic introduces the duel-there’s no turning back.

            The arena itself offers plenty of space to move, dodge, and reposition, which is essential for survival. However, the lack of obstacles means you can’t rely on terrain to block his line of attack.

            Azmadi’s Attack Patterns and Abilities

            Azmadi is a melee-based boss who uses both physical and spectral attacks. His moveset evolves dramatically once the fight reaches phase two, where Zarokh, the Temporal, freezes time to empower him. Recognizing attack animations and keeping your distance at the right moments are the keys to victory.

            Here’s a breakdown of Azmadi’s key abilities:

            1. Sword Dash – A fast, linear dash followed by a heavy slash. Roll perpendicular to his direction to avoid getting clipped.

            2. Single Sword Swing – A simple melee swing, often used as a feint to bait early dodges.

            3. Multi-Swing Combo – A rapid three-hit sequence. Don’t roll early-save your dodge for the final swing.

            4. Sword Throw – Azmadi throws spectral swords one after another. Each throw tracks your last position, so move laterally.

            5. Spectral Heavy Slash – Summons spectral clones before charging up a massive frontal cleave. Roll behind him just before impact.

            6. Blink AoE Slash – Teleports around the arena multiple times, each blink creating a damaging shockwave. Stay on the move.

            7. Spectral Sword Dash – Summons glowing swords that indicate where he’ll dash next. Roll sideways at the last possible moment.

            8. Aerial Slam with Clones – Jumps into the air, spawns illusions, and slams down, releasing multiple wave-shaped slashes.

            9. Delayed Three-Hit Combo – Sends three slashing projectiles; the final one is delayed to punish panic dodges.

            Once his health drops below 60%, Zarokh intervenes, freezing time briefly before phase two begins. From this point forward, all of Azmadi’s attacks become faster and chain more aggressively, leaving very little margin for error.

            Phase One Strategy – Learn and Survive

            During the first phase, Azmadi’s movements are slower and easier to read, making it the perfect opportunity to study his combos.

            Key Tips:

            ·Keep mid-range distance. Too far and you’ll bait Sword Throws; too close and you’ll eat combos.

            ·Dodge toward him during Sword Dashes to end up behind him.

            ·When he throws swords, move horizontally across the arena instead of backward.

            ·For ranged builds, circle him while dropping DoTs or traps.

            Phase one rewards patience. Focus on landing single hits or DoT skills between his combos rather than spamming attacks.

            Phase Two Strategy – Adapt and React

            When Zarokh empowers Azmadi, the fight’s tempo doubles. He’ll chain Blink AoE Slashes with Sword Throws and Multi-Swing Combos, creating deadly pressure.

            How to Handle Each Attack in Phase Two:

            ·Spectral Sword Dash: Watch for glowing swords. He’ll dash between them in sequence. Rolling sideways at the last second avoids the AoE explosions.

            ·Delayed Three-Hit Combo: Time your dodges carefully. Roll through the first two projectiles, then briefly wait before dodging the delayed final wave.

            ·Aerial Slam with Clones: Don’t retreat. Instead, move behind him or to the sides just before impact to avoid the slashing wave cone.

            ·Blink AoE Slash: Keep running diagonally around the arena. Standing still will guarantee a hit.

            Additional Tips:

            ·Save flasks for the second phase; it’s far more punishing.

            ·Maintain vision of him at all times-he often chains teleports into combos.

            ·Use minions or decoys if your build allows; they can absorb some attacks or redirect his aggro.

            Best Builds and Skills for the Azmadi Fight

            While any build can defeat Azmadi with enough practice, certain playstyles have an easier time:

            ·High Mobility Builds (like Ranger or Trickster): Can kite Azmadi easily and reposition quickly during Blink AoEs.

            ·Totem and Trap Builds: Keep dealing damage even while dodging.

            ·Tanky Melee Builds: Can punish his recovery windows, but should invest in strong mitigation or block.

            Avoid glass-cannon setups unless your reactions are near-perfect. His combos can chain-stun you if you’re caught mid-animation.

            Recommended Path of Exile 2 Items for the Fight

            Proper preparation makes all the difference. Certain Path of Exile 2 Items can significantly boost survivability or mobility:

            ·Defensive Flasks: Granite or Jade Flasks for armor/evasion. Consider utility flasks with bleed or stun immunity.

            ·Movement Boots: Look for increased movement speed and cooldown recovery on dashes.

            ·Unique Items: Prioritize pieces that grant life gain on hit, damage reduction while moving, or additional resistances.

            ·Crafted Gear: High resistances (especially chaos and lightning) mitigate some of Azmadi’s secondary effects.

            If you’re short on upgrades, many players buy POE2 Items or buy POE2 Currency from trusted in-game marketplaces to optimize their loadouts before tackling tough bosses. Stronger gear not only improves your damage output but also reduces the risk of getting one-shot by combo chains.

            How to Mentally Approach the Fight

            The Azmadi encounter is as much a mental challenge as a mechanical one. It’s easy to panic after a few failed attempts, but this boss is designed to test timing and patience rather than raw DPS.

            ·Treat early deaths as study runs. Every defeat teaches you a new pattern.

            ·Stay calm after being hit. Don’t chain panic-rolls-they’ll get punished.

            ·Focus on rhythm. Most of Azmadi’s combos have predictable beats once you learn the timing.

            Final Thoughts

            The Azmadi, the Faridun Prince, who fights in Path of Exile 2, represents a true test of player skill, awareness, and adaptability. Unlike many campaign bosses that can be brute-forced, Azmadi demands precision. His relentless combos, empowered phase, and deceptive telegraphs ensure that careless players are swiftly punished.

            However, once you learn his attack rhythm, the fight transforms from chaos into a dance-one where every dodge, roll, and counterattack feels earned.

            With the right preparation, optimized Path of Exile 2 Items, and understanding of his moveset, even fragile builds can emerge victorious. The key lies in patience, observation, and confidence. Master the duel, and you’ll not only progress through the Interlude-you’ll prove yourself capable of surviving anything Path of Exile 2 throws at you.